
It is a information to baking bread with out particular, devoted gear, whether or not you’re a brand new bread baker who isn’t certain but if you wish to decide to the passion, or an skilled baker who needs to bake bread in one other kitchen–when visiting family and friends or staying in an trip rental. This text is meant that will help you make tasty, enticing bread with instruments which can be in most any kitchen.
Touring with Sourdough Starter
The best option to journey with starter is to present it a low-hydration feed simply earlier than you allow. This works for the starter you’re leaving at house within the fridge too. The starter has a sluggish “meal” when you’re in transit and might be fed upon arrival or just refrigerated. Use a sandwich measurement zip-bag or a small jar to carry the starter. A feeding ratio of 1:2:1 (e.g. 30 grams starter, 60 grams flour, 30 grams water) will work for cooler and shorter journeys, and 1:4:2 (e.g.15 grams starter, 60 grams flour, 30 grams water) for hotter and longer journeys.
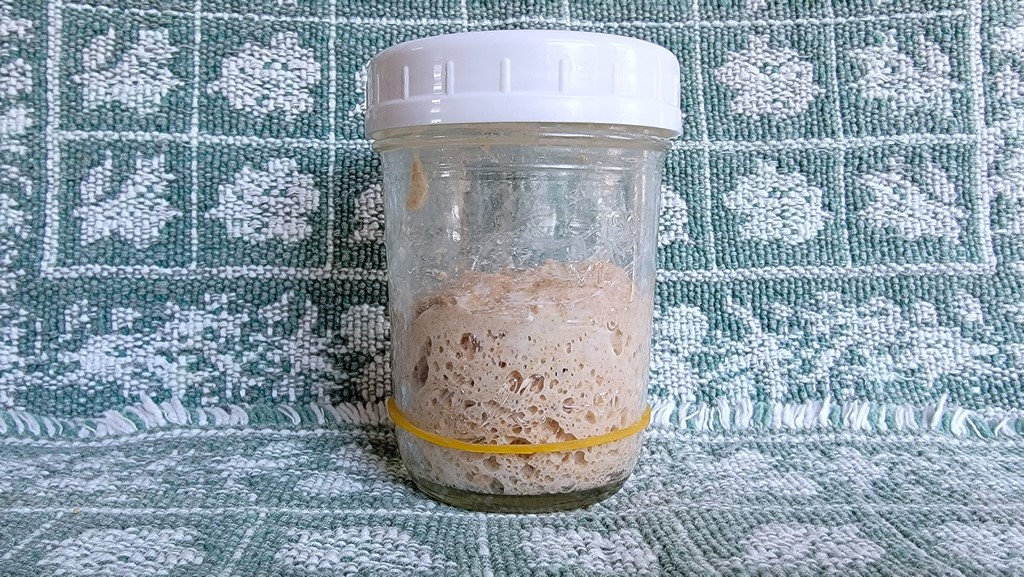
Low hydration starter
Flour and Water
Typically I carry a Tupperware or bag of milled entire grain flour on my travels and generally I simply use no matter all function flour is at my vacation spot. This text on Bread Baking and Flour Substitution Ideas can assist you get snug making bread recipes work with no matter flour you’ve gotten available.
My sourdough starter and dough have thrived on faucet water for per week or two, however I haven’t examined this over an extended time interval. Furthermore, the water in query doesn’t have a robust chlorine odor like some faucet water does. If that have been the case, I would go away a uncovered pan of water out in a single day to evaporate off a number of the chlorine, or I’d purchase spring water.
Quantity and Weight
In case your recipes are in grams and also you often use a scale to measure components; the web, a calculator app, and your senses will make it easier to swap to measuring cups and spoons if they’re all you’ve gotten accessible. Conversions might be discovered by Googling “1 cup water in grams” or “1 tsp salt in grams.” After that, a calculator will assist you determine the volumes. For instance, if Google tells you a cup of water weighs 237 grams and the recipe requires 350 grams water, your equation is 350÷237=1.47 or about 1 1/2 cups water. Lastly when mixing the precise dough, you must contact the dough and assess if it feels proper or wants extra water or flour. “Proper” could also be outlined by the outline of the dough within the recipe or the way you keep in mind the dough from making it up to now.
Google says a cup of flour weighs 120 grams, but it surely’s at all times 130 grams with totally different measuring cup manufacturers and humdity ranges, so that’s the conversion I used within the Breadtopia recipes I’ve written.
Bowls and Mixing Instruments
Any bowl with room to stir vigorously works for mixing the dough. To trace fermentation, bowls with measuring marks or straightwalled buckets are very best however not at all times accessible so I merely guesstimate dough enlargement in an everyday bowl. Another choice for precision is to search for a really slim container to show into an aliquot jar. For mixing, I take advantage of a spatula or a wood spoon after I don’t have a stand mixer or Danish dough whisk in addition to a dough scraper to neaten up the bowl.
To cowl your dough, I like to recommend putting a baking sheet or a plate over the bowl, or put the whole bowl in a plastic grocery bag if in case you have one helpful, or if in case you have reusable bowl covers and also you’re touring, pack one alongside together with your starter. Plastic wrap is a final resort for me as a result of it’s a single-use waste product and in addition very tedious when it sticks to itself as I uncover and re-cover the bowl for stretching and folding the dough.
Be aware that the warning you’ll have heard to not use steel with sourdough has to do with how aluminum breaks down when uncovered to acid, however most bowls and utensils are stainless-steel and due to this fact fully high-quality to make use of.
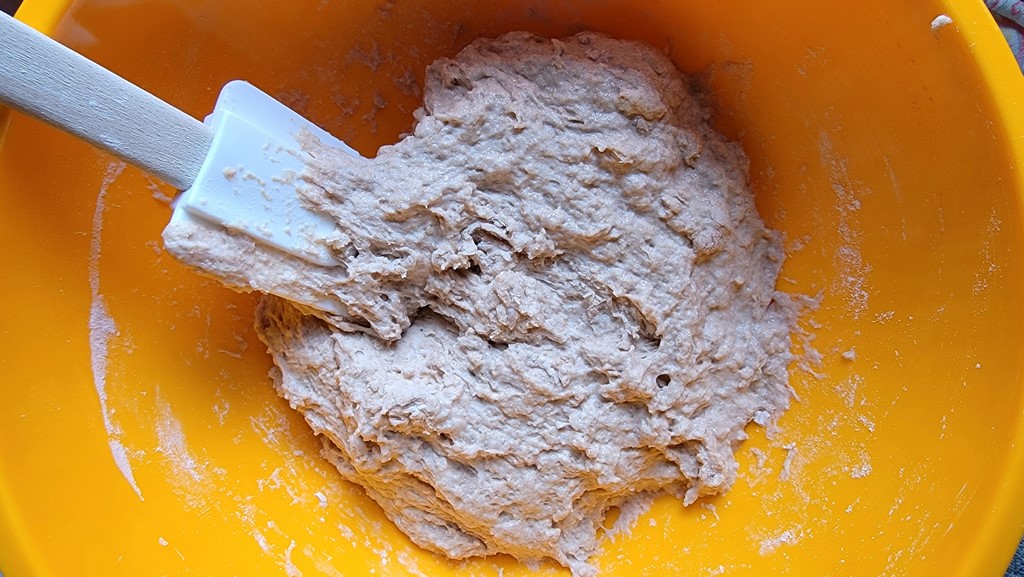
Mixing with a spatula
Temperature Management
With sourdough baking, you at all times need to observe the mantra, “Watch the dough and never the clock.” That is very true in case you’re used to a temperature managed Brod and Taylor Proofer or a warming pad just like the Raisenne Dough Riser. Utilizing the oven with the sunshine on as a warming field can work however solely if in case you have a thermometer to verify simply how heat the sunshine makes the oven. Some ovens hover within the mid-80s with the sunshine on and others stand up into the 90s and past. I want my dough to remain below 85°F to maintain the feel manageable and the flavour a bit much less bitter (temperatures over 80°F favor lactic acid manufacturing).
Shaping
An important instruments for shaping the dough are your fingers, flour, and a clear work floor. If a big wooden chopping board is accessible, that’s a very good possibility to make use of as a piece floor because it has in all probability solely been cleaned with food-safe strategies. Should you’re utilizing the countertop, ensure you completely wash it. Rub the floor with a moist fabric (water or water and white vinegar), wipe it dry, and do that a pair extra instances utilizing a contemporary fabric or paper towel at every step. In a pinch, you may as well form your dough contained in the bowl it has been rising in: raise the dough out with one hand, flour the bowl with the opposite, place the dough again in and proceed with shaping, if a bit awkwardly.
In case your dough is extraordinarily sticky and also you’re actually lacking your bench knife, use the aspect of a straight-edged “steel turner” spatula to maneuver the dough round.
Proofing Basket Alternate options
Earlier than I ever owned a proofing basket, I take advantage of a comparatively deep and slim colander lined with a floured tea towel for the second rise of my dough. Any bowl that encourages the dough to develop upward within the loaf form you need is an efficient alternative, and if you need a bâtard formed bread, use a loaf pan lined with a floured tea towel.
An important factor is to ensure you work loads of flour into the fabric. I discover that every one function flour is adequate although rice flour is healthier at protecting the dough from sticking. Let the towel dry fully earlier than folding as much as retailer on your subsequent use. If you wish to wash the tea towel, achieve this within the sink with lukewarm water. Ensure the flour is out of the material earlier than placing it within the washer, in any other case the towel (and your clothes) will come out with tiny, embedded black dough dots.
For a shorter remaining proof (below 3 hours), you possibly can gently fold the towel excessive of the bowl as a canopy. Should you’re refrigerating the dough for an extended remaining proof, place the basket inside a plastic bag or high it with a plate or bowl to maintain the highest of the dough from drying out.
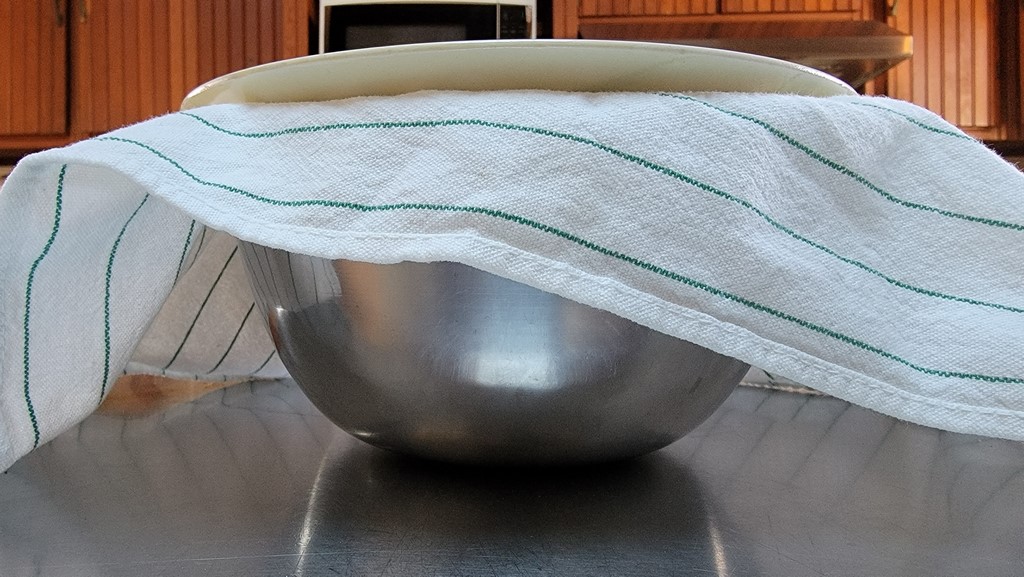
Deep bowl lined with a floured tea towel and coated with a plate
Baking Vessels
A cloche or Dutch oven is the only option for baking artisan type loaves of bread. They supply the perfect quantity and timing of steam to the dough, and so they tolerate the excessive temperatures that maximize oven spring and make a traditional crispy crust. If these aren’t accessible, some alternate options embody:
- A baking stone/metal as a base, with a roasting pan base or metal bowl as a lid/dome over the dough.
- The enameled ceramic inside bowl of a sluggish cooker with aluminum foil or a baking sheet because the lid. Solely the underside of this setup has excessive thermal mass, however bake time is similar in my expertise.
- A complete roasting pan as your vessel. This doesn’t have excessive thermal mass, so bake time may have adjustment.
- A stone/metal as a base with steam added to the oven utilizing strategies described on this ciabatta recipe or this baguette recipe. This technique often requires some trial and error.
Miscellaneous Ideas
Instead of a lame, I take advantage of a serrated knife to attain my dough except there’s a effectively sharpened smooth-bladed knife at my disposal.

Easy deep scoring
Should you’re used to baking in clay vessels and at the moment are utilizing a forged iron Dutch oven, enameled or not, you must learn this FAQ on Stopping a Burnt Bread Backside.
With no probe thermometer, your greatest guess for ensuring the bread is baked by is to push the bake a bit of darker than you usually would possibly and purpose for a hole sound while you knock on the bottom of the bread. Nonetheless, in case you’re baking in an open oven on a stone/metal, the bread will possible get darkish earlier than it’s cooked inside and you could need to tent it with foil partway by.
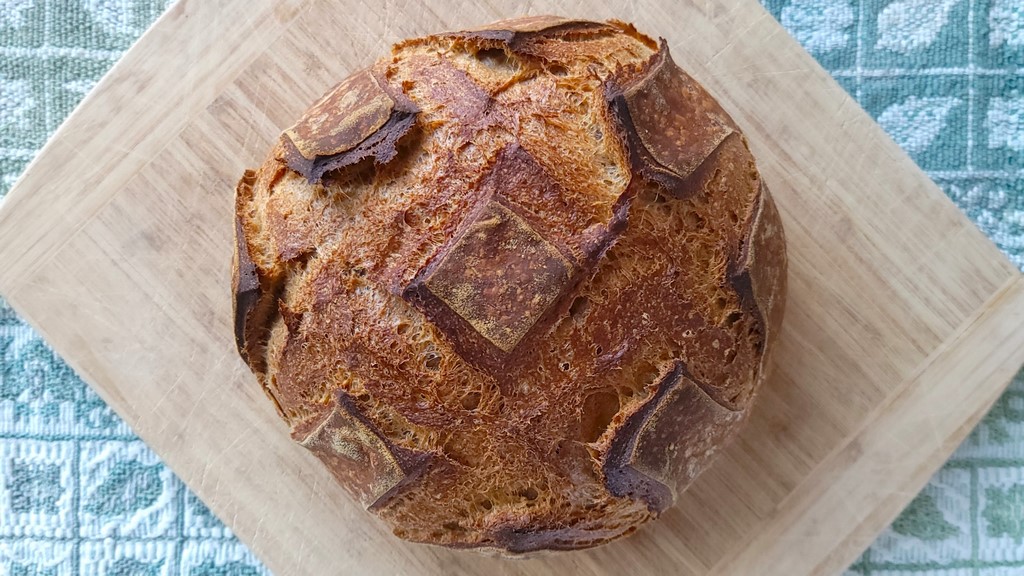
50:50 All Function and Complete Wheat Sourdough Bread
The bread in these images was made utilizing the instruments described above and baked in a primary Dutch oven. I adopted the framework of Eric’s No Knead Sourdough Bread recipe from 2007 with just a few modifications. I had all function flour relatively than bread flour so I decreased the water from 85% to 82% hydration (calculated with the starter’s flour and water). I additionally wished a smaller loaf so I scaled the recipe down from 520 to 460 grams complete flour.
Components
230 grams all function flour (1 3/4 cups)
230 grams yecora rojo entire grain flour (1 3/4 cups)
370 grams water (1 1/2 cups + 1 Tbsp)
70 grams sourdough starter (1/4 cup)
9 grams salt (1 1/2 tsp)
The primary rise was 8 hours in a chilly kitchen. I did 4 rounds of gluten improvement as an alternative of two, and the rests in between have been 20-Half-hour. The ultimate proof was 1 hour at room temperature plus in a single day within the fridge, then baked immediately from the chilly.


